The Only Camera Guide a Beginner Photographer Will Ever Need
Discover the best camera for beginners who want to learn photography—plus essential tips, gear, and settings to master the craft fast.
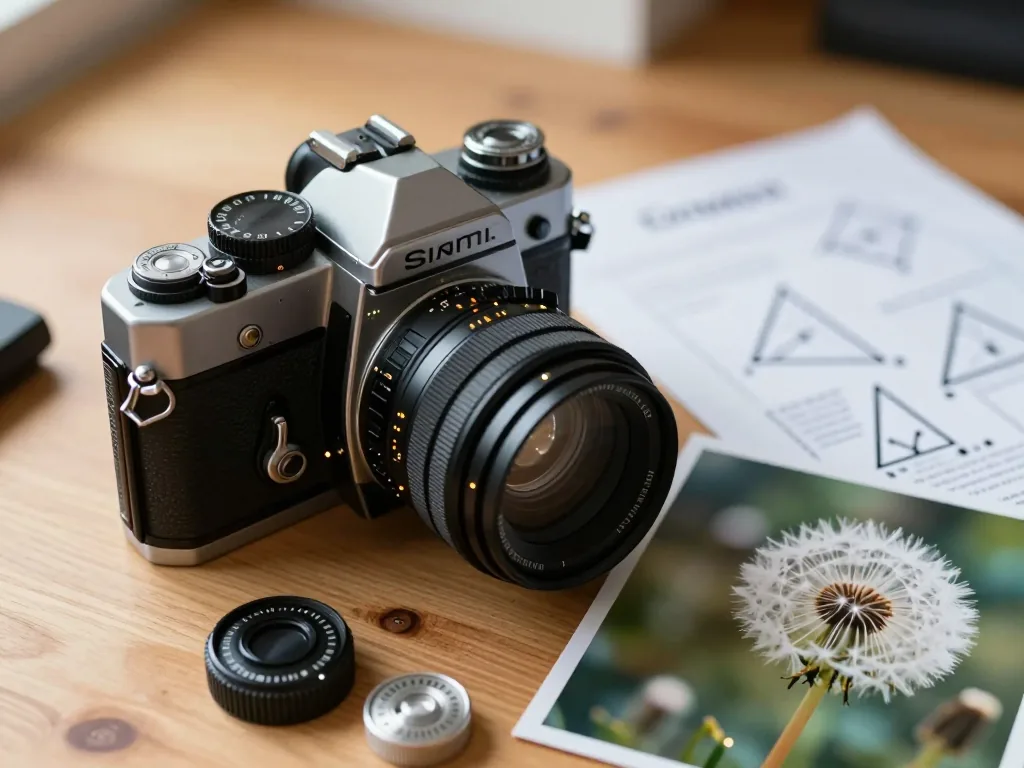
You’ve finally decided to trade your smartphone for a “real” camera—only to find yourself buried under specs, jargon, and a thousand conflicting reviews. The search for the perfect beginner camera can feel more overwhelming than photography itself. It doesn’t have to be. This guide cuts through the noise, stripping away the marketing hype to show you exactly which features matter for learning—and which ones you can safely ignore. By the end, you’ll know precisely which camera to buy, why it fits your skill level, and how to avoid wasting money on gear that will only slow you down.
Understanding the Two Main Camera Types: DSLR and Mirrorless
How They Differ in Mechanics and Viewfinding
At the core of the decision is a mechanical split. A DSLR uses a movable mirror inside the body to bounce light up into an optical viewfinder. Press the shutter, the mirror flips, light hits the sensor—image captured. What you see is direct and unprocessed: pure light, zero lag, no digital guesswork. A mirrorless camera skips the mirror entirely. Light goes straight to the sensor, and you watch a live electronic feed on the rear screen or an electronic viewfinder (EVF). That EVF mimics the final exposure in real time, so you see shadows, highlights, and colors exactly as they’ll appear before you shoot. In practice, DSLRs give you a bright, natural view but keep your settings’ effects hidden until after the fact. Mirrorless cameras show you everything upfront—including a histogram and focus peaking overlays, if you want them. Bodies are generally smaller, lighter, and quieter without the mirror slap. DSLRs, meanwhile, often last longer on a single battery charge (the optical viewfinder draws no power) and offer a deeper, more traditional grip that many hands find reassuringly stable. For a beginner, neither is objectively better. The real question: do you prefer seeing the exposure preview live in the viewfinder, or trust the optical path and check your screen after each shot?
Why Both Are Equally Valid for Learning Manual Exposure
Here’s the liberating truth: the exposure triangle—aperture, shutter speed, ISO—works identically on both. A 50mm lens at f/2.8, 1/125s, and ISO 400 gives you the same exposure, depth of field, and motion blur whether you’re on a DSLR or a mirrorless from the same era. Neither type is inherently easier to learn. Interface, button layout, and menu logic vary more between brands than between camera types. What really counts is ergonomics and budget. If a DSLR feels good in your hands and you can grab a solid used model, you’ll master manual mode just as fast as anyone with a mirrorless. Conversely, if you love instant feedback, the EVF helps you grasp the shutter-aperture relationship quicker because you see the result live. My advice: try both in a store. Cradle each, feel the grip, press the shutter, look through the viewfinder. Whichever feels more intuitive to your hands and eyes is the right one. Entry-level prices in 2026 run from roughly €450 to €850 for a DSLR with a kit lens, and €550 to €1,100 for a comparable mirrorless kit. Both teach the same fundamentals—the camera is just a tool. Your eye and your understanding of light are what matter.
The Essential Mode Dial: Your Learning Roadmap
The single most important feature in a beginner camera isn’t megapixels, sensor size, or Wi-Fi. It’s a dedicated, physical mode dial with the letters M, A/Av, S/Tv, and P. That dial is your roadmap. Its presence tells you the camera respects your desire to grow. Here’s how to use it, step by step.
Start in Program (P). This isn’t “auto” in the lazy sense—it’s a training wheel. The camera picks both aperture and shutter speed, but crucially, it shows you the exact values it chose. You can also shift the pair, keeping the same exposure while choosing a wider aperture. And you can change ISO and exposure compensation. Spend your first week in P, reading the numbers. Ask why it chose f/5.6 here, f/2.8 there. This builds intuition without the risk of a black or blown-out frame.
Next, move to Aperture Priority (A or Av). You set the aperture; the camera adjusts shutter speed. Here, you learn depth of field—that creamy blur behind a portrait (f/1.8 or f/2.8) versus the tack-sharp landscape (f/8 or f/11). You’ll see instantly how your choice shapes the photo’s mood. The camera protects you from slow shutters by warning you, or raising ISO, when things get risky.
Then, try Shutter Priority (S or Tv). Now you control time. Set 1/500s to freeze a running dog, or 1/15s to blur a waterfall. The camera handles aperture, and you learn how motion renders. After a few weeks, the core trade-off clicks: aperture governs light and depth; shutter governs light and motion.
Manual (M) is the final exam, not the first lesson. Here, you set both. Switch to M only when you can predict the outcome before pressing the shutter. By then, it feels like a superpower, not a chore.
Why Auto Modes Can Hinder Your Progress: Full Auto, Portrait, Landscape, or Night Scene modes are the enemy of learning. They hide the exposure triangle completely. You never see ISO, aperture, or shutter speed, so you never learn how they interact. Worse, many beginner cameras bury manual controls in nested menus—forcing you to press “Menu” five times just to change ISO. That friction kills experimentation. A truly beginner-friendly camera puts ISO, exposure compensation, and focus mode on dedicated buttons or top-plate dials. If you hunt for basic settings, the camera works against you. Choose a body that puts controls in your hands—not in a touchscreen submenu.
Sensor Size: APS-C and Micro Four Thirds Explained
The Sweet Spot for Beginners: Balance of Quality, Size, and Cost
Start looking at interchangeable-lens cameras (ILCs), and you’ll hit sensor size jargon fast. Full-frame grabs all the marketing hype, but for a beginner, it’s often overkill—and a financial trap. The real sweet spot? APS-C and Micro Four Thirds (MFT). These two formats rule the entry-level and mid-range mirrorless and DSLR markets for one simple reason: they deliver roughly 90% of the image quality you’ll ever need, while keeping bodies compact and lenses affordable. An APS-C body (think Fujifilm, Sony, or Canon) typically runs €550 to €1,200 for a beginner kit; a Micro Four Thirds body (from Olympus or Panasonic) often lands between €450 and €1,000. Both are light enough for daily carry—which beats any spec sheet, because the camera you have with you is the one you’ll actually learn on. Full-frame bodies start around €1,500 and climb, with lenses that are heavier, bulkier, and two to three times pricier. For learning composition, exposure, and focus, that extra cost buys you little at this stage. You’re not shooting for billboards yet; you’re training your eye.
How Sensor Size Affects Lens Choices and Depth of Field
Here’s where physics gets interesting. A smaller sensor captures a smaller image circle, so the lens barrel itself can be smaller and cheaper. Kit lenses for APS-C and MFT are remarkably compact—a 16-50mm APS-C zoom can weigh under 200 grams, and an MFT 14-42mm is even tinier. That keeps your starting kit affordable and backpack-friendly. But the real lesson is the “crop factor.” Since the sensor is smaller than full-frame, it captures only the central portion of the lens’s projected image. This effectively multiplies your focal length: APS-C has a 1.5x crop (so a 35mm lens acts like a 52mm), and Micro Four Thirds has a 2x crop (a 35mm acts like a 70mm). Beginners often panic, thinking it’s a disadvantage. It isn’t—it’s a tool. That crop gives you extra reach for wildlife, sports, or portraits without buying huge telephoto glass. A cheap 50mm lens on MFT becomes a flattering 100mm portrait lens. The flip side is depth of field: a smaller sensor makes creamy, blurred backgrounds slightly harder to achieve than on full-frame. But with a fast prime (like f/1.8), you’ll still get lovely bokeh. You’re not losing creative control; you’re learning to work within a frame that rewards thoughtfulness over brute force. Master that, and upgrading later becomes a pleasure, not a necessity.
Kit Lenses: The Best Starting Point for Learning Composition
What a Standard Kit Zoom Offers (18-55mm or 14-42mm)
Your first interchangeable-lens camera almost always arrives with a small, unassuming zoom—typically an 18-55mm on APS-C sensors or a 14-42mm on Micro Four Thirds. Most beginners dismiss it as the “boring” option. It’s actually the most educational piece of glass you’ll ever own. That range covers true wide-angle (18mm) through standard (35mm) to a short telephoto (55mm), so you can photograph a sweeping landscape, a street scene, and a compressed portrait without changing lenses. More importantly, it teaches you the single most vital skill: how moving your feet and changing focal length alters perspective and framing. At 18mm, foreground objects loom large and backgrounds recede; at 55mm, faces flatten and backgrounds compress. This isn’t a limitation—it’s a lesson. The lens is sharp enough for prints up to A3, and its variable aperture (typically f/3.5–f/5.6) forces you to understand shutter speed and ISO as you chase light. You won’t get creamy bokeh, but you will get a rock-solid grasp of exposure triangles. Master this lens completely before spending another cent. Shoot 5,000 frames with it, review your failures, and learn why some shots feel “off.” That process—not gear—builds an eye.
When to Upgrade: Signs You’ve Outgrown the Kit Lens
After roughly six months of consistent shooting, you’ll hit the kit lens’s limits in three predictable ways. First, low light: indoors or at dusk, you’ll crank ISO to 3200 and still get blurry shots because the maximum aperture is too slow. Second, reach: you’ll want distant birds or a child on a sports field, but 55mm just isn’t long enough. Third, creative control: you’ll crave clean subject-background separation that only a wide aperture (f/1.8 or f/2) delivers. When these frustrations become consistent—not occasional—it’s time to upgrade. Start with a fast prime like a 35mm f/1.8 or 50mm f/1.8 (from €150 to €350 depending on brand and condition). This single lens transforms your low-light work and teaches the discipline of fixed focal lengths. If wildlife or sports pulls you, a dedicated telephoto zoom (70-300mm) costs from €400 to €900. But be honest: if you haven’t exhausted the kit lens’s creative possibilities, no upgrade will make your photos better. The constraint is your teacher. Keep it for a full year, and you’ll know exactly what your next lens should be—not because a forum told you, but because your own images demanded it.
Ergonomics and Controls That Make Learning Easier
The best camera for a beginner isn’t the one with the most megapixels—it’s the one that gets out of your way and lets you think. Ergonomics are the silent teacher. If you have to dive into a menu to change your shutter speed, you’ll never build the muscle memory that turns exposure theory into instinct. Here’s what to prioritize.
The Importance of a Viewfinder (Optical or Electronic)
First, get a camera with a viewfinder. Composing on the rear screen alone feels intuitive, but it fails you in bright sunlight, where glare turns your image into a guess. More importantly, holding the camera to your face creates a third point of contact—your forehead and two hands—which dramatically reduces shake at slower shutter speeds. You’ll nail sharper shots with a viewfinder than you ever will holding the camera at arm’s length.
Now, choose between two types. Electronic viewfinders (EVFs), found on mirrorless cameras, show you a live preview of your exposure before you press the shutter. If your photo is too dark, the viewfinder literally shows you a dark image, so you instantly know to open your aperture or slow your shutter. This feedback loop is the single fastest way to learn the exposure triangle. Optical viewfinders (OVFs), found on DSLRs, show the scene exactly as your eye sees it—no lag, no pixels, just pure light. That’s beautiful, but it’s also less informative: you won’t know your image is blown out or underexposed until you look at the review screen. For a beginner, an EVF is a massive advantage. But an OVF isn’t a dealbreaker—it’s just a steeper learning curve.
Physical Dials and a Tilting or Articulating Touchscreen
Next, hunt for dedicated physical dials for shutter speed and aperture. You want a camera with a top dial labeled “S” or “Tv” that clicks through 1/250, 1/125, 1/60, and so on, plus a second dial (often near the lens mount) for aperture. When you can feel the clicks under your thumb, you start to internalize how each stop changes light. Menu-based control—where you press a button, scroll, and confirm—breaks your flow and makes you forget what you just changed. Physical dials keep you in the moment.
Finally, don’t underestimate a tilting or articulating touchscreen. It’s not just for selfies. A tilting screen lets you shoot from ground level without lying in the mud, or hold the camera overhead to shoot over a crowd. An articulating screen that flips out sideways is even better for vlogging or shooting at awkward angles. And the touchscreen matters for focus: touch-to-focus lets you tap your subject’s eye on the screen, and the camera instantly locks onto it. That’s a phenomenal teaching tool—it shows you exactly where the camera is looking, and you can learn to override it manually as you grow. In 2026, expect to pay anywhere from €500 to €1,200 for a beginner body with these features, depending on whether you choose a used DSLR (cheaper, OVF) or a new mirrorless (pricier, EVF). Don’t spend more until you’ve outgrown the basics.
In-Camera Guides and Help Screens: Your Built-In Teacher
How Help Screens Explain Aperture, Shutter Speed, and ISO
Most entry-level interchangeable-lens cameras (ILCs)—from Canon, Nikon, Sony, or Fujifilm—come with a dedicated “help” button, often marked by a question mark or a small “i” icon. Press it while a setting is highlighted, and the camera offers a plain-language explanation of what that control does. This isn’t a generic manual dump; it’s contextual. Dial in a wider aperture like f/1.8, and the help screen might show a simple diagram of a background blurring into soft circles, with a caption like “Large aperture = shallow depth of field.” Switch the shutter speed to 1/1000s, and the screen may illustrate a frozen runner beside a blurred one, explaining motion freezing versus motion blur. ISO adjustments trigger a visual graph showing noise climbing as the number rises. These screens are deliberately brief—two or three sentences plus a graphic—so you can read them, glance back at your scene, and see the real-world effect immediately. Use them actively: change one setting at a time, press help, observe the change in your viewfinder or rear LCD, then adjust again. Many cameras also feature a live “info” overlay with a mini histogram and a depth-of-field scale as you turn the dial, turning every shot into a mini lesson.
Why You Shouldn’t Rely Solely on External Tutorials
YouTube tutorials and photography books are valuable, but they share a fatal flaw: they aren’t about your scene. A video explaining aperture with a studio model’s portrait doesn’t show how f/2.8 will render the tree branch three meters ahead, under overcast light, with your specific lens. In-camera guides are immediate, contextual, and interactive. When you change shutter speed while framing a moving cyclist, the help screen doesn’t just tell you what it does—it shows the effect on that exact cyclist. This real-time feedback loop accelerates learning. You aren’t passively absorbing information; you’re experimenting, observing, and correcting within seconds. Passive learning from external sources often leads to memorizing rules without grasping why they work. In-camera help forces you to connect cause and effect while your finger is still on the dial. Over a single afternoon of shooting, you can internalize what aperture, shutter speed, and ISO do to a degree that might take weeks of reading. So before you buy a camera, check that its help system is robust—most major brands offer it on entry-level models. You aren’t just buying a tool; you’re buying a patient, always-available tutor that never tires of your questions.
Connectivity and Sharing: Wi-Fi and Bluetooth as Standard Features
Gone are the days when a camera was a lonely island, needing a card reader and computer to see your shots. Today, built-in Wi-Fi and Bluetooth aren’t luxuries—they’re essential learning tools. When picking your first serious camera, make wireless transfer non-negotiable. It turns your phone into a portable, high-resolution review monitor that fits in your pocket.
Transferring Photos to Your Smartphone for Review and Sharing
Speed is the obvious win. A tap in the camera’s app sends a full-resolution JPEG or compressed preview to your phone in seconds. But this isn’t just for social media—it’s for critical review. Your camera’s rear screen is small and often misleading in bright sunlight. Your phone’s larger, calibrated display reveals fine details: whether the eye is tack-sharp, highlights are blown, or the horizon is crooked. Most manufacturer apps also pull up full metadata—exact aperture, shutter speed, and ISO. Compare two similar shots side-by-side to see how shifting from 1/125s to 1/500s changed motion blur. Many apps include a remote shutter, letting you trigger the camera from your phone. That’s invaluable for self-portraits, group shots, or long exposures where pressing the button causes shake. Set up on a tripod, compose on your phone, release remotely—a learning exercise in composition and timing.
How Connectivity Helps You Learn From Your Mistakes
Wi-Fi’s real power is the feedback loop. As a beginner, you lack instinct for why a photo failed. Too dark because ISO was low? Background blurry because aperture was wide? Reviewing on your phone right after shooting, you can check the histogram—a tonal distribution graph—to spot underexposed shadows or clipped highlights. Tap into saved EXIF data for exact settings. This instant visual confirmation turns every mistake into a mini-lesson. Within weeks, patterns emerge: “Every time I shoot indoors at f/2.8, my shutter speed drops and I get blur.” That realization beats any tutorial. So when comparing cameras, skip the megapixel race. Download the manufacturer’s app and test it. Does it connect fast? Crash? Show metadata easily? A clunky app breaks your flow. For most beginner-friendly mirrorless cameras from Canon, Sony, Nikon, or Fujifilm, companion apps are mature and dependable, with bodies plus kit lenses typically ranging from €550 to €900 in 2026. Invest in solid connectivity, and you’ll learn faster than you thought possible.
Lens Mount Compatibility: The Long-Term Commitment
Why Each Brand Uses a Specific Mount and What That Means
Every manufacturer builds its lenses around a proprietary mount—the physical and electronic link between body and glass. Canon uses RF, Nikon Z, Sony E, Fujifilm X, and Micro Four Thirds (shared by Panasonic and OM System) has its own standard. Even within one brand, mounts often split by sensor size: Canon’s RF serves full-frame, while APS-C cameras take RF-S; Sony’s E-mount covers both, but full-frame lenses are physically larger and won’t fit APS-C bodies without compromise. These mounts aren’t interchangeable across brands. Adapters exist but frequently slow autofocus, introduce chromatic aberrations, or fail to communicate aperture data. The moment you buy your first camera, you’re not just purchasing a body—you’re signing a long-term lease on that brand’s entire lens lineup. Trade-in value plummets, and switching ecosystems later means selling everything at a loss. This is the most overlooked decision in beginner photography.
How to Choose a System With Room to Grow
Before you swipe your card, spend an hour researching the lens catalogue for each mount you’re considering. Count how many affordable prime lenses (e.g., 35mm f/1.8 or 50mm f/1.8) exist under roughly $350. Check whether the system offers budget zooms like a 24-70mm f/4 or 70-300mm for under $600. Professional-grade options—fast f/2.8 zooms, tilt-shift, macro glass—should also be present, even if you won’t buy them for years. A healthy system is a pyramid: cheap but sharp entry-level lenses, mid-range workhorses, and high-end choices you can grow into. Avoid systems where the only affordable lenses are kit zooms or where third-party makers (Sigma, Tamron, Viltrox) are locked out. Also weigh used-market availability: older lenses for a mature mount (like Sony E or Fujifilm X) are plentiful and cheap, while a new mount may have none. In 2026, a decent APS-C body from Sony, Fujifilm, or Canon will cost €600 to €1,200, but your real investment is the two or three lenses you’ll buy in the first year—budget €400 to €1,500 for those. Don’t buy the cheapest body and then discover the only affordable lens is a mediocre kit zoom. Buy into a system where your second, third, and tenth lens are all sensible purchases. That’s the commitment that pays off.
Conclusion
Choosing the best camera for learning photography isn’t about the priciest or most feature-packed body. It’s about picking a tool that removes barriers and encourages daily practice. Maybe that’s a mirrorless model with modern autofocus, a DSLR with a familiar viewfinder, or even a premium compact. The real “best” camera is the one you’ll carry and shoot with consistently.
Your next step is simple. Set a budget. Handle a few models in a store. Then buy a used or entry-level body with a versatile 35mm or kit lens—and commit to shooting one photo a day for a month. Through that practice, you’ll master the exposure triangle and composition. You’ll outgrow any gear limitations long before you need an upgrade.
The camera is just the starting line. Your curiosity and repetition are what make you a photographer.