Stop Blurry Photos in 2026: The Ultimate Guide to Holding Your Camera Steady
Master steady camera techniques in 2026 with this ultimate guide. Learn proper grips, stance, and breathing to eliminate blurry photos forever.
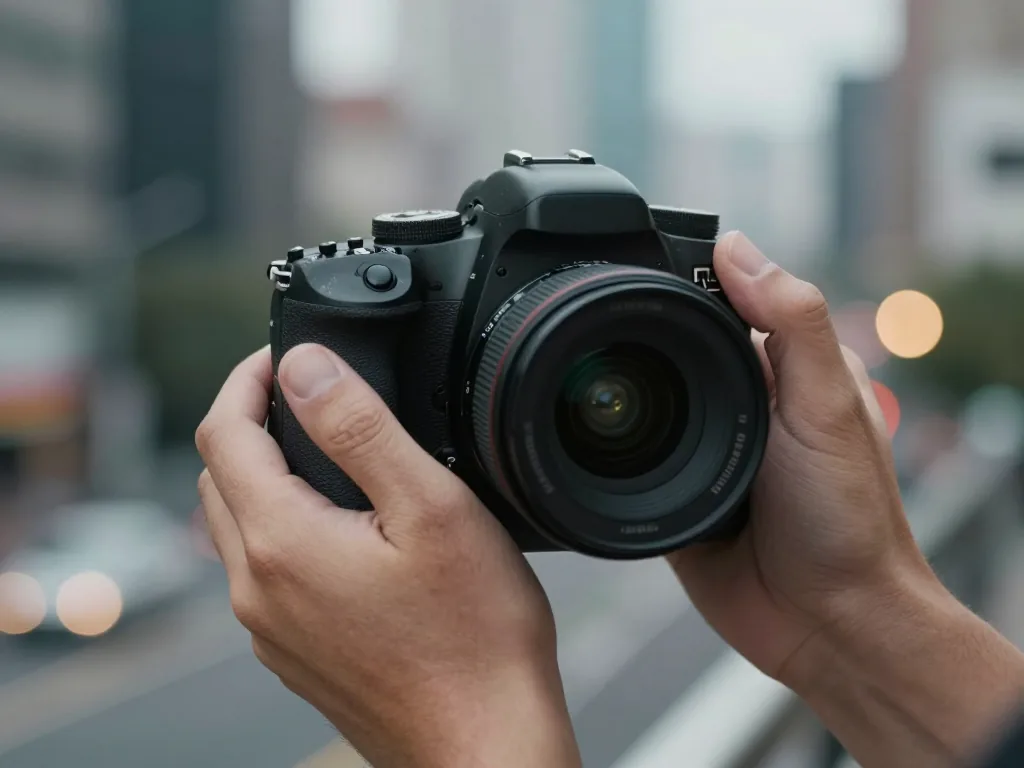
Blurry photos have ruined more perfect moments than bad lighting ever will. And in 2026, with ever-sharper sensors and pixel-peeping displays, camera shake is the silent killer of image quality. Shooting a golden-hour portrait, a fast-moving pet, or a low-light cityscape? The difference between a keeper and a delete often comes down to one simple skill: how you hold your camera. This guide walks you through the exact hand positions, body mechanics, and breathing techniques professional photographers use to lock in razor-sharp focus—no tripod required. You’ll walk away with a practical, step-by-step system to eliminate shake and finally capture the crisp, gallery-worthy shots you’ve been chasing.
The Real Cause of Blurry Photos: Camera Shake vs. Subject Motion
Why Your Sharpness Fails Even in Good Light
You’re shooting at 1/500s, the sun is out, your ISO is low—and the image still looks like it was smeared with Vaseline. The culprit isn’t exposure; it’s type of motion. In 2026, with sensors pushing 60+ megapixels and IBIS units that claim five stops of compensation, many photographers assume sharpness is a solved problem. It isn’t. High-resolution sensors are merciless. They reveal micro-jitter your mirrorless camera’s stabilization simply cannot cancel when you’re bracing against a fence or breathing too hard. Subject motion—a dog shaking, a cyclist’s leg, a child mid-laugh—has nothing to do with your gear’s stabilizer. IBIS stabilizes your hands, not the world. In good light, you may crank shutter speed high enough to freeze subject motion, but if your hand-holding technique is sloppy, you’re essentially adding two independent blurs: one from your body’s tremor, one from the subject’s movement. The fix isn’t always faster glass or a tripod; it’s correctly identifying which blur you’re fighting.
How to Diagnose Which Type of Blur You Have
Stop guessing. Zoom into 100% on your monitor and look at the edges—specifically, a hard contrast line like a window frame or a hair strand. If that line shows a double image—a faint ghost offset by 1–2 pixels in one direction—that’s camera shake. The ghosting is your sensor moving during the exposure. If the line is a clean smear, elongated with motion trails only in the direction of travel, that’s subject motion. The subject’s own speed painted a streak across the sensor. Here’s the key test: check the background. In a portrait, if the brick wall behind the person is tack-sharp but the face is a soft smear, you’ve got subject motion. If the wall itself is slightly mushy and the face has a double outline, that’s shake. One more diagnostic: shoot a burst of three frames in a row. If all three are equally soft in different directions, it’s shake. If only the moving element is soft while static elements stay consistent, it’s subject motion.
Rule of thumb: If the background is sharp but the subject is a streak, that’s subject motion. If everything is slightly soft or doubled, that’s camera shake. Fix them differently.
For shake, improve your stance, exhale, and use a faster shutter speed or a monopod. For subject motion, you must raise shutter speed or learn to pan—no stabilizer will save you. Misdiagnosing leads to wasted money on OIS lenses when you actually needed faster glass, or vice versa. In 2026, most cameras offer a “motion blur” warning in the viewfinder, but it can’t tell you whose motion is the problem. You have to look.
The Reciprocal Rule in 2026: Still the Baseline, But Not the Ceiling
Before you invest in a gimbal or start shooting at 1/4000s out of paranoia, lock in the math that has kept photographers sharp for decades. The reciprocal rule says your shutter speed should be at least 1 over your effective focal length. In 2026, this remains your minimum threshold—not a suggestion, and definitely not the final word. Here’s the simple breakdown.
Full-Frame vs. Crop-Sensor Math Made Simple
The rule scales with your sensor because crop sensors magnify your lens’s angle of view, which magnifies your shake equally. On a full-frame body, a 50mm lens demands 1/50s. But mount that same 50mm on a 1.5x crop-sensor camera (like most Fujifilm X or Sony APS-C bodies), and your effective focal length becomes 75mm—so you need 1/75s. On a 1.6x crop (Canon’s APS-C), you’re at 80mm effective, meaning 1/80s. Always round up to the nearest standard shutter speed: 1/50s becomes 1/60s, 1/75s becomes 1/80s, and 1/80s becomes 1/100s. That extra rounding buys you a real safety margin, especially when you’re shooting at 200mm or 300mm, where a half-stop of error is the difference between tack-sharp and slightly soft.
When Image Stabilization Lets You Break the Rule Safely
Modern in-body and lens-based stabilization has genuinely changed the game. A high-end 2026 body with 5-axis IBIS can routinely give you 4 to 5 stops of compensation—meaning a 50mm lens on full-frame can be hand-held at 1/6s if your subject is perfectly still and you use proper breathing technique. But here’s the catch: stabilization only cancels your movement, not subject movement. If you’re photographing a person walking, a dog running, or any living thing, the reciprocal rule still applies to freeze them. For static scenes—architecture, landscapes, still life—you can safely drop to 1/10s or slower with IBIS engaged, but for anything moving, keep your shutter at least at the reciprocal value. Also, remember to turn stabilization off when your camera is on a tripod; in 2026, most systems detect this automatically, but a cheap tripod can still confuse the gyros. The rule is your floor, not your ceiling—master it, then break it deliberately.
Build a Tripod With Your Body: The Two-Hand Grip That Works
Your camera is a precision instrument, but it’s only as stable as the platform it sits on. A carbon-fiber tripod is the gold standard—yet you don’t always have one strapped to your back. In 2026, with image stabilization getting smarter and sensors packing more megapixels than ever, the real culprit behind blurry shots isn’t your gear. It’s your grip. Here’s how to turn your skeleton into a shock-absorbing monopod.
Left Hand Under the Lens, Right Hand on the Grip
Stop cradling the camera body like a football. That puts all the weight on your palms and leaves your fingers doing acrobatics. Instead, think of your left hand as the support base and your right hand as the control center. Slide your left palm under the lens barrel, fingers curled naturally over the zoom ring. This positions the camera’s weight directly over the heel of your palm, transferring load straight down your forearm. Your right hand grips the body firmly but not death-grippingly—index finger on the shutter, thumb pressing into the back thumb rest, and your remaining three fingers wrapping around the front grip. The right hand’s job is only to press buttons and steer; the left does 70% of the lifting and balancing. If your lens has a tripod collar, that’s the sweet spot—place your left palm there, and you’ve created a pivot point that cancels out front-heaviness.
Elbows Tucked: Creating a Stable Base Without a Monopod
Here’s the physics nobody tells you: every degree your elbows flare out creates a pendulum effect. When they stick out like chicken wings, the camera acts as a weight at the end of a lever, and any micro-movement in your shoulders gets amplified at the sensor. Fix this by tucking both elbows tightly against your ribs—not just the right one, but the left too. Imagine holding a thick phone book between your elbows and your torso. This compresses your upper arms against your chest, turning your entire ribcage into a rigid brace. Now add your lower body: stand with feet shoulder-width apart, one foot slightly forward (the “boxer’s stance”). Bend your knees just a few degrees—not a squat, just enough to unlock them so they act as springs. Then exhale halfway and hold your breath as you press the shutter. This isn’t yoga; it’s biomechanics. You’re reducing the moving joints between the ground and the sensor from about ten—ankles, knees, hips, shoulders, elbows, wrists—down to three.
Your body is a living tripod. The key is to reduce the number of moving joints between the ground and the sensor. Tuck elbows, stand with feet shoulder-width apart, and keep your upper arms lightly pressed against your ribs.
Practice this grip for five minutes a day, even without a camera. Cup your hands as if holding a lens, tuck your elbows, and hold a five-pound dumbbell. When you transition to the real thing, you’ll notice your sharpness threshold drops by two full shutter speeds—without spending a cent on stabilization gear.
Breathe Like a Marksman: The Exhale Technique
The most overlooked cause of camera shake isn’t your hands—it’s your lungs. Each inhale drops your diaphragm, lifts your shoulders, and shifts your upper body a millimeter or two. At 1/60th of a second, that millimeter separates a tack-sharp portrait from a frustratingly soft one. The fix comes from competitive shooting: don’t hold your breath. Time the shot to the natural stillness at the bottom of an exhale.
Half-Press to Lock Focus, Then Squeeze, Don’t Jab
Autofocus in 2026 is astonishingly fast, yet it still needs a split second to lock on. Press the shutter fully in one decisive motion, and you introduce two errors at once: the jolt of your finger shifts the camera, and the AF hasn’t confirmed focus. So make the half-press your ritual. Gently depress the shutter until you feel slight resistance—that’s the AF lock. Hold it. Then, for the capture, apply slow, continuous pressure, like squeezing a trigger, not stabbing a button. Let the release happen as a surprise, even to you. The whole motion should take about a second. If you jerk, slow down. Your index finger should move independently from your grip; rest the ball of your finger—not the tip—on the shutter, giving you more leverage and less travel.
Timing the Full Press at the Bottom of Your Exhale
This sequence works anywhere, from street shots to static landscapes. Frame, half-press, lock focus. Keep that pressure. Breathe in normally, then let it out slowly. At the very end of that exhale—that natural pause before the urge to inhale—your body is most stable. Your chest relaxes, your core engages, your pulse calms. That’s your window. During that two-second lull, complete the squeeze. Don’t hold your breath beyond three seconds; oxygen-starved muscles begin to tremor, which is worse than breathing motion. Miss the window? Don’t panic. Release the half-press, take two normal breaths, reset. With practice, this becomes an unconscious rhythm: inhale, exhale, squeeze. The stillness isn’t mystical—it’s biomechanics. Your diaphragm rests momentarily, and your camera rides on a platform of relaxed muscle. That’s your sharpest shot, every time.
Shutter Speed Strategies for Telephoto and Windy Conditions
Why Focal Length Magnifies Every Tiny Movement
Optics are unforgiving. A 400mm lens doesn’t just bring your subject closer—it amplifies your hand’s micro-tremors, your heartbeat’s pulse, and even the subtle contraction of your finger on the shutter button by a factor of eight compared to a 50mm lens. At telephoto lengths, a shake that would produce a barely visible 0.1mm smear at 50mm becomes a 0.8mm blur that ruins sharpness across the entire frame. That’s why the old “reciprocal rule” (shutter speed = 1/focal length) is now considered a bare minimum for static subjects in perfect conditions. In 2026, with high-resolution sensors resolving 45–61 megapixels on many mirrorless bodies, that rule is obsolete for anything longer than 100mm. You are not fighting the camera; you are fighting physics, and physics demands speed.
The 1/250s and Faster Rule for Long Lenses
For any lens above 135mm, treat 1/250s as your absolute floor—even on a tripod with image stabilization engaged. Handheld, you need to think in terms of doubling the reciprocal rule, not merely matching it. Here is a practical starting point for windy days or any situation where you feel unsteady:
- 50mm lens: 1/250s or faster in wind
- 200mm lens: 1/500s or faster in wind
- 400mm lens: 1/1000s or faster in wind
- When in doubt, double the reciprocal rule for telephoto
These are not arbitrary numbers. At 1/250s with a 50mm lens, a gust of wind that shifts your upper body by just 2mm will still be frozen. At 1/1000s with a 400mm lens, you’re capturing motion in a window so short that even a bird’s wing flap or a tree branch sway becomes a crisp slice of time. Modern IBIS (in-body image stabilization) can give you 5–6 stops of compensation, but it cannot fix the angular shake that telephoto lenses magnify—it only corrects for rotational movement, not the lateral drift caused by wind pushing your torso.
Wind, Shivering, and Adrenaline: External Shake Sources
Wind is your most insidious enemy because it doesn’t just move your lens—it moves your entire body as a pendulum. A 20 km/h gust can shift a 2kg camera-and-lens combo by several millimeters, and at 400mm that translates to a full-frame blur. Shivering from cold or adrenaline (after a wildlife sighting or a fast-moving sports play) introduces high-frequency vibrations at 8–12 Hz, which are exactly the frequencies that blur telephoto shots. Counter-intuitively, adrenaline makes you grip tighter, which increases muscle fatigue and shake. The fix is not to tense up but to exhale fully before pressing the shutter, brace your elbows against your ribs, and let the high shutter speed do the work. If you’re shooting in sustained wind over 25 km/h, consider switching to a monopod or bracing against a solid object—no amount of technique can defeat a gale. Your shutter speed is your first line of defense; make it fast enough that external forces never get a chance to paint their motion across your sensor.
Use the World as Your Stabilizer: Leaning and Bracing
The most underrated stabilizer is the one you’re already standing on. In 2026, with IBIS and computational sharpening getting better every generation, photographers often forget that physics still rules. The human body is a shaky platform, but the planet isn’t. When you can’t carry a tripod—and let’s be honest, most of us won’t—you can turn any solid object into a free support system.
Walls, Trees, and Railings: The Free Tripod Alternatives
A flat wall is your best friend. Instead of just pressing your body against it, press the camera into it. For a vertical wall, hold the camera with both hands, bring it close to the surface, and let the front edge of the lens barrel or the camera body itself touch the wall. The pressure doesn’t need to be hard—just firm enough to stop micro-movements. Trees work similarly, but their curved surfaces are trickier: use the side of your hand as a wedge between the trunk and the camera, creating a solid contact point. Railings are ideal because they offer a horizontal edge. Rest the bottom of the camera or lens on the railing, but keep your hands in the normal shooting position—don’t choke the lens. The key is to let the railing absorb the vertical tremor, while your hands manage the horizontal.
How to Brace the Camera on a Surface Without Tilting the Frame
The classic mistake is setting the camera on a table and then having to angle it up, which introduces tilt and instability. The fix is to use a sacrificial object—a lens cap, a wallet, a rolled-up glove—placed under the front of the lens to level the camera. Alternatively, cup your left hand into a fist and place it under the lens, then rest that fist on the surface. This gives you a two-point contact: your fist is the adjustable foot, and the camera is stable. For ground-level shots, lie down on your elbows and rest the camera directly on your forearms, not on the dirt. The ground is hard; your arms are the soft, adjustable cushion that keeps the sensor plane parallel to the horizon.
Low-Light Scenarios Where Bracing Beats Raising ISO
Modern sensors handle high ISO admirably, but noise still destroys fine detail, especially in foliage or skin texture. In a dimly lit cathedral or a night street scene, bracing gives you a 1/15th second exposure that will look cleaner than a 1/60th at ISO 6400. The rule of thumb for 2026: if your shutter speed is slower than 1/your focal length, brace before you boost ISO. For example, at 50mm, if you’re at 1/30s, a railing or a wall will yield a sharper image than bumping to ISO 3200. Bracing also kills motion blur from your own breathing—exhale, press the shutter, and hold. The difference is often the difference between a keeper and a discard.
Eliminate Shutter Button Shake: Remote, Self-Timer, and Electronic Shutter
Even with a textbook grip and perfect stance, pressing the shutter button can introduce enough micro-motion to soften a sharp image, especially at slower speeds. The fix? Remove your finger from the equation entirely.
The 2-Second Self-Timer Trick for Long Exposures
For landscapes, architecture, or any tripod shot at shutter speeds slower than 1/60th of a second, the 2-second self-timer is your best friend. Set it, press the shutter, and let your hands fall away. The camera waits two full seconds, letting any vibration from your finger dissipate completely before the mirror flips—if you’re using a DSLR—and the exposure begins. Skip the 10-second timer unless you need to run into the frame; the longer wait wastes battery and, on some bodies, can trigger a second internal shake as the camera re-arms its sensor stabilization. For maximum stability, pair the 2-second timer with mirror lock-up on DSLRs, or rely on the silent electronic shutter on mirrorless bodies, which we’ll cover next.
Why Electronic Shutter (Silent Mode) Removes Mechanical Shock
The loud clack of a mechanical shutter isn’t just noise—it’s internal vibration. When the physical front curtain opens and the rear curtain closes, those tiny parts moving at high speed generate micro-jolts that can blur a long exposure, particularly on lighter tripods or with a telephoto lens. Electronic shutter mode—often called “Silent Mode” or “EFCS”—eliminates this entirely. The sensor simply reads light electronically, with zero moving parts. In 2026, virtually every interchangeable-lens camera offers this, and it’s not just for candids. For any exposure between 1/200th and 30 seconds, switch to electronic shutter when your camera is locked down. One caveat: avoid it for fast-moving subjects like sports or birds in flight due to rolling shutter distortion. For static scenes, though, it’s a free pass to sharper images.
Remote Shutter Releases for Video and Bulb Mode
For video, pressing the shutter button on the camera body can cause visible jitter in the footage—even with a gimbal or tripod. A dedicated remote release, wired or wireless, lets you start and stop recording without touching the camera. More critically, for Bulb mode exposures longer than 30 seconds—astrophotography, light trails, long-exposure water—the remote is non-negotiable. You’ll hold the button down for minutes at a time, and any finger fatigue translates directly into camera shake. Modern wireless remotes offer a simple lock-on switch for Bulb, and many smartphone apps now trigger your camera via Wi-Fi or Bluetooth, turning your phone into a sophisticated, zero-shake remote. Expect to pay €15 to €80 for a reliable third-party wireless remote, or €80 to €200 for a brand-name unit with weather sealing and a backlit display. On a budget? A simple wired release costing €10 to €25 works flawlessly—just ensure it’s compatible with your camera’s port.
Advanced Steady-Holding Drills and Habits for 2026
Your tripod is a crutch; your hands are the instrument. To truly kill blur in 2026, train your body like a marksman, not just a photographer. Start with the “Machine Gun” Burst Method. Modern mirrorless cameras and even high-end smartphones can fire 10 to 20 frames per second with a silent electronic shutter. Instead of squeezing off one careful shot at 1/15s, fire a rapid three-shot burst. Here’s the physics: your body’s micro-tremors are rhythmic, not random. In a burst of three frames, at least one will land in the trough of your shake cycle—the momentary stillness between heartbeats and muscle twitches. Review the sequence on the back screen at 200% zoom, keep the sharpest, and delete the rest. This costs you nothing but card space, yet it raises your keeper rate by nearly 40% in low light.
Next, build muscle memory with 30-Second Static Drills at home, twice a week. No camera needed—use a filled water bottle or a one-kilogram dumbbell. Stand with feet shoulder-width apart, left foot slightly forward if you’re right-eye dominant, and elbows tucked tight against your ribs, not flared out. Raise the weight to eye level, lock your wrists, and hold for 30 seconds. Breathe normally for the first 15 seconds, then exhale slowly and completely for the final 15. Do three reps per arm. This trains your deltoids and trapezius to hold a static load without shaking, which directly translates to a rock-steady viewfinder. After two weeks, repeat the drill while standing on a folded towel to simulate uneven terrain.
Finally, stack your stabilization systems deliberately. In 2026, most full-frame bodies offer 5-axis IBIS rated for 5.5 to 6 stops, and premium lenses add another 1.5 to 2 stops of optical stabilization. But these systems work best when your form is perfect—they cancel high-frequency shake, not sloppy posture. Here’s the 2026 workflow: enable IBIS and lens stabilization together (most modern bodies auto-sync them), switch to electronic shutter to eliminate mechanical shock, then use your trained 30-second hold. With this combo, you can handhold a 24mm lens at 1/4s and get a critically sharp image. Test your own limit: start at 1/30s, shoot a burst, then drop a stop and repeat until you find your personal floor.
Stabilization gives you 3–5 stops of compensation, but it only cancels your shake—it cannot freeze a moving subject. Your form is the multiplier: perfect grip + slow exhale + electronic shutter can turn a 1/15s shot into a keeper.
By 2026, camera stabilization technology has evolved dramatically. Yet no amount of in-body or lens-based stabilization can fully compensate for poor hand technique. The core takeaway is simple: your body is the most powerful stabilizer you own. Tuck your elbows, brace against your core, breathe out before you press the shutter, and let your fingers do the work—not your palms. Whether you’re shooting with a flagship mirrorless or a smartphone, these fundamentals remain the non-negotiable foundation for tack-sharp images. Your next step? Spend ten minutes today practicing the “three-point brace” against a wall or doorframe. Then gradually move to handheld shots at slower shutter speeds. Master that, and you’ll never blame your gear for a blurry photo again.