Aperture mastery in 2026 how aperture shapes depth of field
Master aperture in 2026: learn how f-stops shape depth of field, from creamy bokeh to deep focus, with clear examples for understanding aperture.
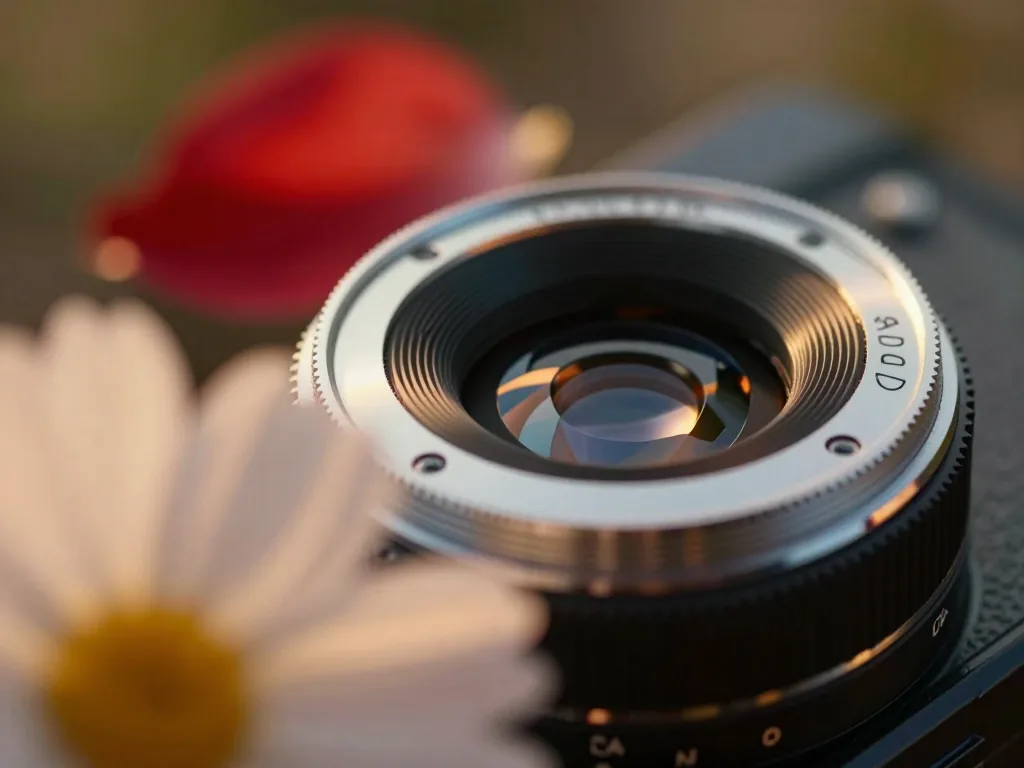
In 2026, computational photography and AI-driven lens simulations are reshaping how we shoot. Yet the aperture remains our most honest control over depth of field. The aperture’s size dictates what falls into sharp focus and what dissolves into blur. Understanding this is still the difference between a snapshot and a photograph. This guide walks you through the mechanics of aperture, from f-stop fundamentals to the real-world trade-offs of light and focus, so you can shape depth of field with intention rather than guesswork.
What aperture actually is and how f-numbers work
Every lens you mount on a camera in 2026, from a mirrorless prime to a cinema zoom, contains an adjustable diaphragm: a ring of overlapping blades that opens and closes to control how much light passes through. That physical opening is the aperture. Its size is the single most direct control you have over depth of field. A wide opening lets in plenty of light and produces a shallow zone of acceptable sharpness. A narrow opening restricts light and stretches that sharp zone deeper into the scene.
The lens opening and the f-number scale
Aperture is expressed as an f-number, written like f/1.8 or f/11. The number describes the ratio between the lens’s focal length and the diameter of the opening. A 50mm lens set to f/2 has a physical opening of 25mm; the same lens at f/4 has an opening of 12.5mm. Because it is a ratio, the f-number means the same thing across every lens and format. That is why a phone camera, an APS-C body, and a full-frame rig all speak the same aperture language.
The standard scale runs f/1.4, f/2, f/2.8, f/4, f/5.6, f/8, f/11, f/16, f/22. Each step is called a stop, and each stop either doubles or halves the light reaching the sensor. The scale looks irregular because it is geometric: f/1.4 to f/2 is one stop, f/2 to f/2.8 is another, and so on. Modern cameras let you move in third-stop increments, so you will often see f/3.5 or f/6.3 displayed. Fast primes typically bottom out around f/1.2 to f/1.8, while kit zooms often start at f/3.5 to f/5.6 and close down to f/22 or f/32.
Why smaller numbers mean bigger openings
The counterintuitive part trips up nearly every beginner: f/1.8 is a much larger opening than f/16. The confusion comes from reading the number as a size rather than a fraction. Think of f/2 as 1/2 and f/16 as 1/16. One half of a pie is far more than one sixteenth, and the same logic applies to light. A smaller denominator means a larger physical hole.
This matters for depth of field because the size of the opening governs how tightly light rays converge. A large opening (small f-number) bends incoming light steeply, so only subjects near the focus plane render sharply. A small opening (large f-number) lets rays arrive closer to parallel, keeping more of the scene acceptably sharp from foreground to background. In practice, a portrait at f/1.8 might isolate the eyes while blurring the ears; the same framing at f/11 could hold the entire face and background architecture in focus. Diffraction eventually softens the image at extreme settings like f/22, so the deepest depth of field is not always the sharpest overall result.
How aperture controls depth of field
Aperture is the most direct control you have over depth of field—the range of distance in a photograph that appears acceptably sharp. The mechanism is optical, not digital. A wider opening lets light converge from a broader cone of angles, so only subjects near the exact plane of focus render crisply. A narrow opening restricts that cone and pulls more of the scene into focus. In 2026, with high-resolution full-frame and medium-format sensors commonplace, this relationship matters more than ever: dense pixel pitches expose focus falloff that older 24MP bodies often masked.
Shallow versus deep depth of field explained
Shallow depth of field means only a thin slice of the scene is sharp—typically a subject’s eyes, while the ears and background dissolve into blur. Deep depth of field keeps foreground, midground, and background all readable. Neither is inherently better; the choice is narrative. A portrait often wants shallow focus to isolate a face. A landscape or architectural interior usually wants deep focus, so every plane carries information.
The zone of acceptable sharpness in practice
Strictly speaking, a lens focuses at exactly one distance. Everything else is “acceptably” sharp based on the circle of confusion—the largest blur spot the eye still reads as a point at normal viewing size. Depth of field, then, is not a fixed physical truth but a perceptual threshold tied to print size, viewing distance, and sensor resolution. Stop down, and that threshold expands.
- Wide aperture (small f-number, e.g., f/1.8): shallow depth of field, blurred background. Ideal for isolating subjects, but at f/1.8 on a 50mm lens focused at 3 metres, your usable sharp zone can be under 30cm.
- Mid aperture (e.g., f/5.6–f/8): moderate depth of field, balanced sharpness. Often the optical sweet spot where most lenses are sharpest and diffraction is negligible.
- Narrow aperture (large f-number, e.g., f/16): deep depth of field, most of the scene sharp. Useful for landscapes, though diffraction softens fine detail beyond roughly f/11 on many modern sensors.
Practical takeaway: change aperture first, then adjust distance and focal length, since those two variables shift depth of field just as powerfully.
The exposure trade-off of every f-stop
Every click of the aperture dial is a bargain you strike with the light. Understanding that bargain separates photographers who merely adjust settings from those who command them.
Halving and doubling light with each full stop
Aperture values such as f/1.4, f/2, f/2.8, f/4, f/5.6, f/8, f/11, and f/16 represent full stops. Each step changes the light reaching the sensor by a factor of two. Move from f/2.8 to f/4 and you halve the light; drop from f/4 to f/2.8 and you double it. Here is the counterintuitive part: the numbers move in the opposite direction from the light. Larger f-numbers mean smaller physical openings; smaller f-numbers mean wider ones. The reason lies in the ratio itself. The f-number is the focal length divided by the diameter of the effective aperture, so f/2 on a 50mm lens means a 25mm opening, while f/8 means just 6.25mm. The area of that circular opening scales with the square of its diameter, so a one-stop change corresponds to a factor of √2 (roughly 1.4) in the f-number — which is why the familiar sequence looks so peculiar. Modern mirrorless bodies in 2026 often let you work in third-stop increments, so a single click may shift exposure by only about 26 percent rather than a full doubling. Useful for fine-tuning, but easy to lose track of when you are counting stops in your head.
Compensating with shutter speed and ISO
Because depth of field and exposure are locked to the same control, changing aperture forces a compensating move elsewhere. Open up from f/5.6 to f/2.8 to blur a distracting background — a two-stop gain in light — and you must recover those two stops by halving the shutter duration twice, by dropping ISO by two stops, or by combining both. Suppose you were shooting at 1/125s, f/5.6, ISO 800. At f/2.8 you could switch to 1/500s at ISO 800, or hold 1/125s and pull ISO down to 200 for cleaner files. Each path carries its own consequence. Faster shutter speeds freeze motion but demand more light; lower ISO reduces noise but narrows your margin in dim conditions. In 2026, sensors with dual-gain architectures and AI-driven denoising have widened that margin considerably, but the physics of the trade-off has not budged. The practical discipline: decide first what depth of field the image needs, set aperture accordingly, then solve for shutter speed and ISO around it — rather than letting exposure drift dictate the look of your focus.
Other factors that shape depth of field
Aperture is the control most photographers reach for first. But it never works in isolation. Two other variables—focusing distance, and focal length combined with sensor size—can transform depth of field just as dramatically. Understanding them keeps you from blaming your f/1.8 lens when the real culprit is where you stood.
Focusing distance and subject-to-background separation
Depth of field expands and contracts with your focusing distance. It is easy to feel, but easy to forget. Focus close, and the zone of acceptable sharpness collapses to millimetres. Focus at infinity, and it stretches toward the horizon. A macro shot at f/16 might yield only a centimetre of sharpness. The same aperture focused on a distant ridge can hold everything from a few metres out to forever.
The practical lever here is subject-to-background separation. Depth of field describes what is acceptably sharp. Background blur, however, depends on how far the background sits behind your subject. Move your subject two metres from a wall instead of twenty centimetres, and even at f/8 the wall melts into a soft wash. This is why portrait photographers obsess over distance rather than aperture alone: stepping your subject forward often does more than opening up two stops. The corollary matters too. When you cannot separate your subject from the background, stopping down buys you little, because the background is simply too close to blur.
Focal length and sensor size effects
The old claim that focal length does not affect depth of field is technically true only under tightly controlled conditions. Those conditions rarely survive contact with real shooting. In practice, a 200mm lens at f/2.8 renders backgrounds far creamier than a 24mm at f/2.8. Largely, this is because you fill the frame from farther back and magnify the background behind your subject. Longer focal lengths compress perspective and amplify whatever blur already exists.
Sensor size compounds this. A full-frame body and a smaller sensor camera at the same aperture and equivalent field of view produce different results. The smaller sensor demands either a shorter lens or a greater working distance to frame the same scene. Micro Four Thirds at f/2.8 gives roughly the depth of field of full frame at f/5.6—a feature for landscape work, a frustration for shallow-focus portraiture. Medium format pushes the other direction, delivering razor-thin planes of focus that demand careful technique.
None of this diminishes aperture’s importance. It remains your most immediate, most repeatable control. But treat it as one dial among three. Distance, focal length, and sensor format decide what aperture can actually accomplish before you ever touch the ring.
Choosing aperture for real shooting situations
Theory is one thing. Deciding what to dial in when the light is changing and your subject won’t sit still is another. Fortunately, most situations fall into two broad families, and each has a sensible starting point you can refine from there.
Portraits, close-ups, and subject isolation
To lift a person or object out of its surroundings, you want a shallow depth of field—which means a wide aperture. On full-frame, f/1.4 to f/2.8 is the classic portrait range. On APS-C or Micro Four Thirds, f/1.8 to f/2.8 gives a similar look once you account for the crop factor. The trap is going too wide. At f/1.2 with an 85mm lens focused on the eyes, the tip of the nose and the ears can both fall outside the plane of acceptable sharpness, especially at close working distances. For a tight head-and-shoulders frame, f/2 to f/2.8 is often the sweet spot: enough blur to melt the background, enough depth to keep the whole face crisp. Close-up and macro work is where the math gets brutal. At 1:1 magnification, even f/8 may yield only a few millimetres of sharpness, so many shooters stop down to f/11 or f/16 and accept the diffraction trade-off—or focus-stack several frames. Eye detection autofocus in 2026 bodies is remarkably good, but it can’t rescue an aperture that’s simply too wide for the distance.
Landscapes, architecture, and group shots
Here the priority flips: you want front-to-back sharpness, so you stop down. A common starting point is f/8 to f/11, near the sharpest point of most lenses while still giving generous depth. Resist the urge to reach for f/22 out of habit—on high-resolution sensors, diffraction softens the whole frame well before you gain meaningful extra depth. Instead, focus roughly a third of the way into the scene (the hyperfocal approach) and let the geometry do the work. For architecture, you’ll often be on a tripod anyway, so you can afford slower shutter speeds and a lower ISO to fund the smaller aperture. Group shots are their own puzzle: everyone on the same plane needs to be reasonably sharp, which usually means f/5.6 to f/8 if people are standing in a single row, and f/8 to f/11 if they’re arranged in two or three staggered rows. If the background matters—a landmark skyline behind the wedding party, say—check that your chosen aperture keeps it recognisable rather than a smear. A quick review at 100% on the back screen, or better, a tethered tablet, will tell you in seconds whether you’ve nailed it.
Aperture priority mode and modern camera workflow
Aperture priority mode remains the single most efficient way to translate your creative intent into a technically sound exposure. In 2026, it is more capable than ever. You choose the f-stop; the camera selects the shutter speed. That division of labour maps directly onto how depth of field works: aperture is your creative decision, shutter speed a technical consequence you can delegate. On a modern body, the exposure algorithm also balances ISO within your chosen Auto ISO range. Lock in f/2 for a portrait and the camera will drift the shutter to 1/250s and the ISO to 400 without a second thought.
The practical discipline is knowing when aperture priority will betray you. In bright light at f/1.4, the camera may hit its maximum shutter speed and overexpose. Most current bodies warn you with a flashing value. Respond by dropping ISO or adding an ND filter rather than abandoning the mode. In dim light at f/16, shutter speeds can fall below your hand-holding threshold, and the camera will happily hand you a blurry frame. Set a minimum shutter speed in the Auto ISO menu — 1/125s for people, 1/500s for moving subjects — and the camera will raise ISO instead of risking motion blur. That one setting turns aperture priority from convenient into reliable.
Switch to manual when the light is stable and you want frame-to-frame consistency: studio strobes, panoramas, timelapses, or any sequence where a drifting exposure would ruin the match. Switch to program mode when speed matters more than control — street photography in shifting light, handing the camera to a stranger, or documentary work where you would rather not think about settings at all. Program shift, still present on most 2026 bodies, lets you bias the aperture/shutter pair with a dial while staying in the automatic exposure logic.
A useful hybrid: stay in aperture priority with Auto ISO and exposure compensation on a rear dial. You retain depth-of-field control, the camera handles shutter and sensitivity, and one thumb corrects the meter’s interpretation of a backlit or high-key scene. For most photographers, most of the time, that is the fastest route from seeing a shot to getting it.
Lens sharpness, diffraction, and the sweet spot
Every lens has a performance curve, and aperture sits at its centre. Wide open, most lenses—even premium glass—show some softness at the edges, a touch of vignetting, and the occasional chromatic aberration. Stop down a stop or two, and those flaws recede. Micro-contrast improves. Corner detail tightens up. The whole frame starts to look like the lens you paid for. This is why f/2.8 to f/4 on a fast prime, or f/5.6 to f/8 on a zoom, so often delivers the crispest results. The aperture blades are no longer wide open, aberrations are better controlled, and light is passing through the more optically correct central region of the elements. For landscape, architecture, and product work in 2026, this is still the first thing to test on any new lens: shoot a brick wall or a test chart at every full stop and find where sharpness peaks. That peak is your sweet spot.
But keep stopping down, and the curve reverses. Diffraction takes over. As the aperture narrows, light has to squeeze through a smaller opening, and it spreads out—bending around the blade edges rather than travelling in a clean cone. The result is a softer image across the entire frame, not just the corners. On a 45MP full-frame sensor, diffraction typically becomes visible around f/16 on many lenses, and by f/22 it is unmistakable. On high-resolution APS-C or Micro Four Thirds bodies, the effect kicks in earlier, often by f/11. This is physics, not a lens defect, and no amount of sharpening in post fully recovers it.
The practical takeaway for 2026: know your lens’s sweet spot, and treat diffraction as a real cost when you chase extreme depth of field. If you need everything from foreground to horizon sharp, consider focus stacking at f/8 rather than stopping down to f/22. Modern cameras and software make this trivial, and the results are dramatically better. Use narrow apertures deliberately—for long exposures or creative sunstars—but not by default. Aperture is a tool with a sharpness budget, and diffraction is the tax you pay for spending it.
Smartphones, computational depth, and what changes in 2026
Fixed and simulated apertures on phone cameras
Pick up almost any flagship phone in 2026. You will find an aperture specification like f/1.6 or f/1.7 printed in the marketing material. That number usually describes the fixed physical aperture of the main lens—a hole that cannot close down or open up the way a diaphragm does on a dedicated camera. Some manufacturers have experimented with dual-aperture mechanisms, and a handful of premium models now offer a two-position switch. The vast majority of phone lenses, however, still shoot at one physical aperture for every frame. The variable f-numbers in a phone’s interface, ranging from something like f/1.4 to f/16, are simulated: the camera captures at its native aperture, and the software fakes the rest, often by blending multiple exposures or applying graduated blur. This matters because the exposure triangle you learned on a DSLR does not transfer cleanly. On a phone, changing the “aperture” in portrait mode typically changes only the background rendering, not the amount of light reaching the sensor.
Portrait modes and software-generated background blur
Portrait modes have matured considerably by 2026. Early versions produced halos around hair and smeared spectacles into mush. Current depth-estimation models, trained on far larger datasets and often running on dedicated neural hardware, segment subjects with impressive accuracy. The phone captures a depth map using parallax from dual or triple cameras, sometimes assisted by LiDAR or time-of-flight sensors, then applies a blur kernel whose radius you control with a slider. The result can look convincingly like an 85mm f/1.4 lens, but it is a rendering, not an optical event. Edges between foreground and background are the tell: real bokeh transitions gradually because out-of-focus light spreads across the sensor, while computed blur often stops abruptly at a detected boundary. Reflections, transparent objects, and fine strands of hair remain the hardest cases, and even in 2026 they occasionally betray the algorithm.
Aperture still governs light and blur on dedicated cameras, but on phones the shallow-depth look is often computed rather than created optically.
For photographers who care about the physics, this distinction is not academic. On a mirrorless body, stopping down from f/1.8 to f/4 genuinely reduces the light hitting the sensor and deepens the plane of focus. On a phone, the same slider movement changes only the post-processing. If you want optical depth control in your pocket, you are still waiting. If you want the look, the software has become remarkably good at faking it, and for many photographers that is enough.
Conclusion
Mastering aperture remains the single most powerful lever you have over depth of field in 2026, even as computational photography and AI-assisted focus stacking become standard in modern cameras. The core principle is unchanged: a wider aperture like f/1.8 isolates your subject with a shallow plane of focus. A narrower aperture like f/16 extends sharpness across the scene, at the cost of light. Your next step is simple. Set your camera to aperture priority mode, pick a single subject, and shoot the same composition at f/2, f/8, and f/16. See the effect with your own eyes. That one exercise will teach you more than any specification sheet. From there, you can begin choosing apertures intentionally rather than by habit.